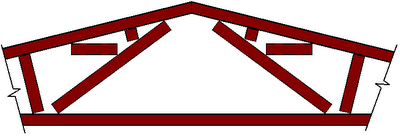
Now that RAC 2011 has some of the RST tools built in, we need to cover a few RST tips.
Here's some basic truss info. that the RST people are already well aware of.
The first time drawing a Truss all members get assigned to the last 'Beam' that was drawn. As shown below with a C-Channel.

Then we change the framing members in the
truss type properties as shown in the two images below.


Here's the poop:
By default, when you draw a truss the first time it uses the last 'Beam' member used in the project as all the truss chord members. So the first truss may look a little wonkie because it places C-Channels or WF beams as the truss chord members.
If you check the 'type' properties of the truss you can change all the truss members after (or before) the fact. Once the new members have been assigned to the truss type you are ready to draw more trusses or duplicate and create different types.
Try this:
1. Start a new project and use the beam tool or load a different framing family and draw a beam.
2. Start the Truss tool and draw a truss end to end.
3. Go to a 3d view or elevation and check the truss members. They will all be the same family as the last beam you placed in point 1. above.
4. To fix, just change the truss type properties for top, vertical, diagonal and bottom chord.
* Change your detail level to 'Course' and trusses (like all structural framing) become single line diagrams.
* Trusses can also extend upward and downward by 'attaching' (just like walls) to shape themselves to a roof or floor. . . . but that is a different lesson . . . .


 Then we change the framing members in the truss type properties as shown in the two images below.
 Here's the poop: