Wednesday, July 09, 2014

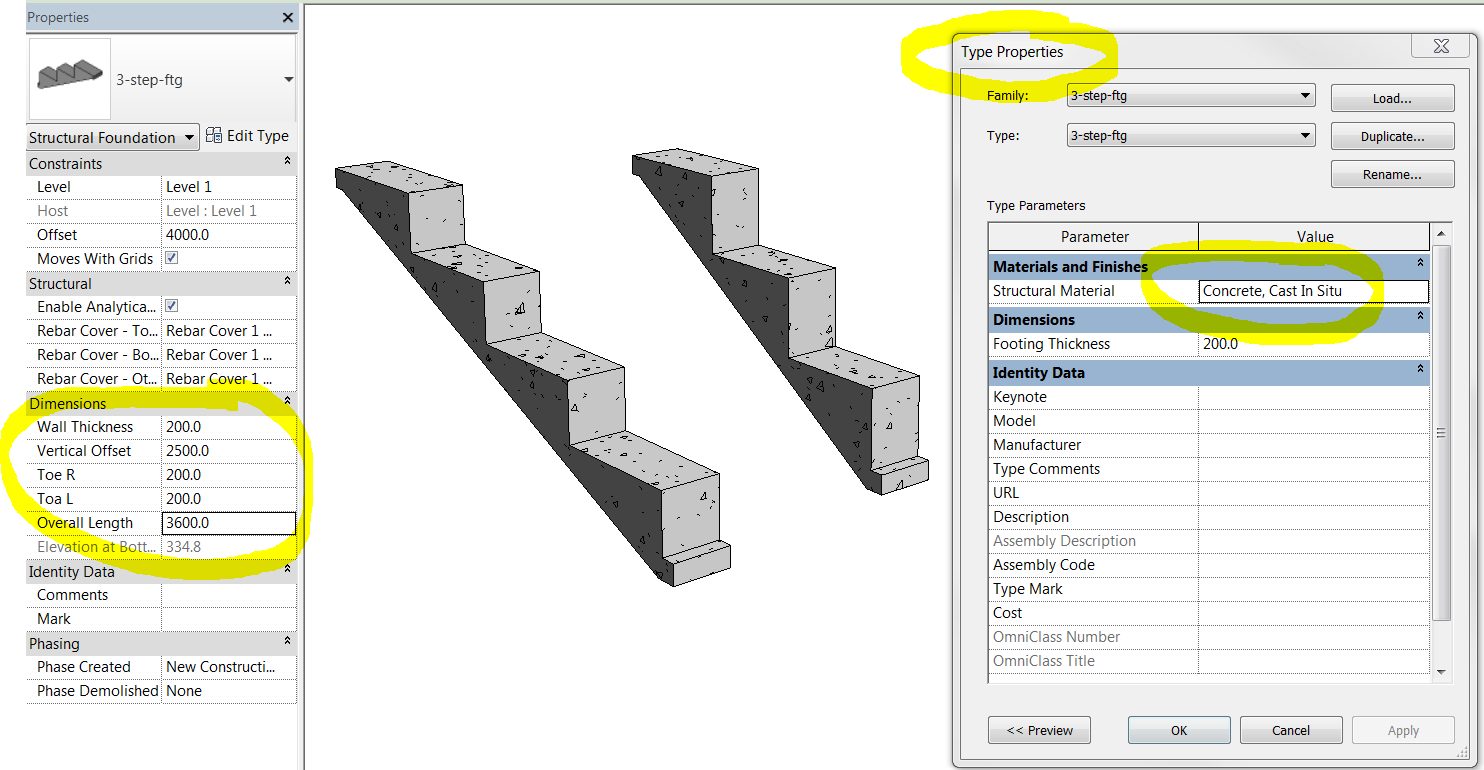
REVIT Stepped Footing Family Download


Here's a great little set of REVIT families for Stepped Footings. 

Surprisingly enough REVIT comes with NO 'out of the box' method to properly model a stepped footing and it's a major "Pain in the A$$" to try to model one. As a newbie it's next to impossible.

Well . . . .fear not my fellow reviteers . . . you can download the 3 and 4 stepped footing families shown above in the ZIP file below.

Any problems with it just drop me a line : )


Friday, June 13, 2014

Cool REVIT Adaptive Family


Here's a great example of what you can do with an 'Adaptive Family' in REVIT.

Once placed there are control nodes along the sweep that you can pull around to change the path of the sweep.

I placed 3 of them then tugged on the controls to make them wind in and out of each other.

. . . . and as you can see, you can apply a 'material' to them just like any other family.


Adding a 'Z' offset parameter to a REVIT framing tag family


Image 1
Tag family placed in the Project

I added a 'z Offset Value' parameter to my Structural Framing Tag family. 

I LIKE IT !

I also added brackets using the prefix and suffix options. See below.


Image 2
Family in the Family Editor

Become the office 'REVIT MASTER' by watching
these famous REVIT Video Tutorials.

Saturday, May 24, 2014

Electrical Drafters Required - Calgary Alberta - Great Job


A large, very reputable company in Calgary Alberta Canada is looking for a few electrical drafting people with CAD and hopefully REVIT skills.

Great job, Great Benefits and Good Company to work for.

* TRAINING CAN ALSO BE ARRANGED *

contact:

daryl@dgcad.com

Thursday, May 22, 2014

Even Mechanical Elements look Cool with Sketchy Lines


The New REVIT 2015 Sketchy Lines even make Mechanical Elements look Cool !

Monday, May 19, 2014

Have you ever tried linking the OOTB REVIT advanced models together ?


This is just me having fun with the new Jitter view property and as usual discovered something completely unrelated and extremely interesting along the way.

This post may very well have solved one of the biggest REVIT mysteries ever known.

"Why can't I get the REVIT Advanced Models to Link together properly".

Oh . . . we have tried, we got frustrated beyond belief then we just give up. Well not any more !

I wanted to use a composite model of the three Autodesk provided advanced models. Arch, Mech and Struct.

Has anyone ever tried to actually link the 3 disciplined Autodesk OOTB (out of the box) advanced project models together using either Origin or Basepoint ? It's a frustrating experience because it will not work. And when I say it will not work I mean it will NEVER work. Read on . . .

Here's our deceptive little culprits front and center.

rac_advanced_sample_project.rvt
rst_advanced_sample_project.rvt
rme_advanced_sample_project.rvt
(link to cleaned up models provided below) 

These files have been kicking around for over 12 years so it's a bit of a surprise when they totally don't line up (not that anyone has claimed that they should) when you try to link them together, they have different grid spacing and different level spacing and they all have different position relationships to the original project base point which is critical. The original factory set project base point is in fact the 'Origin' when it comes to linking.

To make matters even worse these files also contain elements of the other disciplines. In other words the mechanical model contains architectural elements and the the architectural model contains structural elements etc. This is SOOOOO NOT how it's done and if you set out to confuse a new user to the nth degree you have succeeded wonderfully. The mech model should NEVER contain architectural elements and vise versa. We each model our stuff and link the other discipline models in. Autodesk provides a horrible example of how it's supposed to be done. In fact they could not have possibly provided worse sample files of how it's done. Then again, CAOS is cash for me . . . : )

If the project Base Point has been relocated you can right click it and click 'Move to Startup Location' and that's all fine and dandy but if you've started to model that doesn't solve the problem. You would then have to physically move the model and all the view annotations to line up with that base point. This is not the same as the 'Relocate Project' tool and a huge undertaking depending on how far the project has progressed. 

The project 'origin' and the relationship with a grid intersection should be established before anything is drawn. This is paramount. Then when you link and use 'Origin to Origin' it all works perfectly and shared coordinates are not required.

However Autodesk decided to throw us a screwball by providing 3 sample projects that closely resemble each other but have different origin relationships, grid spacing and level spacing : ) NICE ! And that's been confusing it's users for . . . . Oh . . . . . about 12 years.

They simply will not link properly together EVER unless you do these three things.

1. Use a Shared coordinate system and publish to the other files.
2. Cleanup the individual models so they have in fact have the same grid spacing and level spacing.
3. Cleanup each model and delete the elements that are not indicative of it's discipline.

Then you are off to the races.

I have at times tried to use these files on the fly to demonstrate linking models together, always expecting that they do in fact line up. They never line up and I generally move on (always a little perplexed for both me and my audience) never to investigate further. Well this morning, like a dog on a bone I mined down to get my answers.


Most people don't realize that the 'Origin' is the OOTB default Project Base Point. Because the relationship of a common point in each model and it's local default 'project base point' (Origin) is different in each autodesk provided model and the models are 50% complete we must now use Shared Coordinates.

I've saved everyone a ton of work and confusion by providing 3 cleaned up models with correct grids and level spacing. They all link into each other properly using a shared coordinate system. The models have also been cleaned up of their respective elements (ie: architectural elements deleted from the mech model and mechanical elements deleted from the architectural model)

Generally we 'copy monitor' the grids and levels but this is a great example, provided by Autodesk themselves, of what NOT to do with linked models and 'Origins'.

Here's the new cleaned up linked files.

Sunday, May 18, 2014

CADclips REVIT Rebar Cover Tutorial


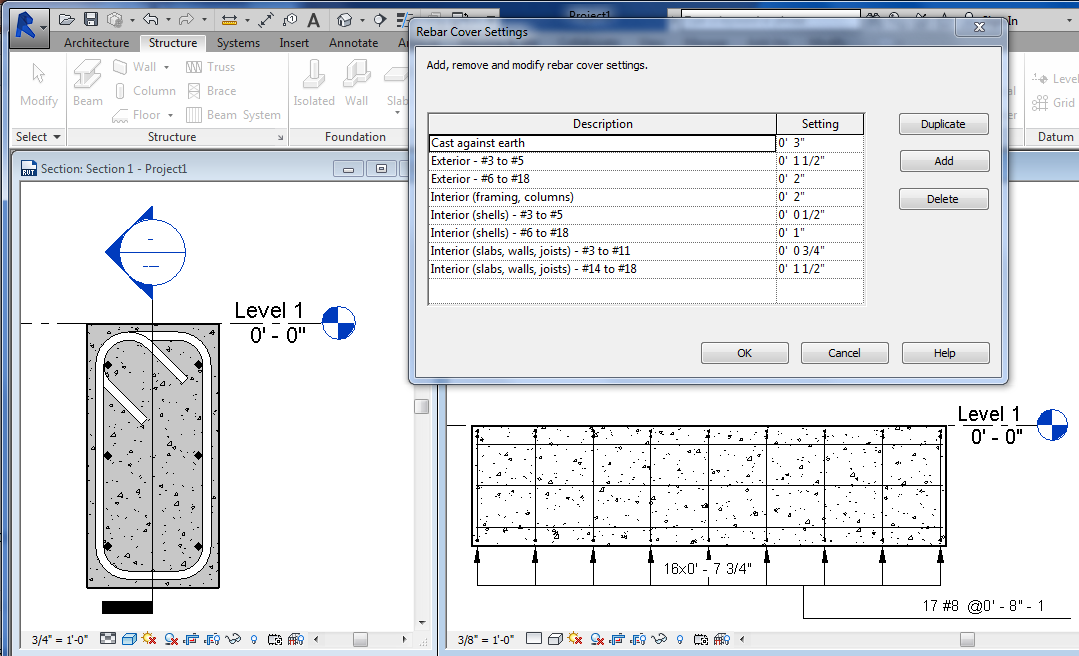
Always check the global Rebar Cover Settings under 'Structural Settings' on the Structural ribbon tab.

There are several predefined scenarios and you can make your own as well.

In the REVIT Training Tutorial below you will learn how to apply these rebar cover rules to beams, columns, walls and slabs and how they actually update the model.

If you have stirrups around continuous rebar place the stirrups first then the continuous rebar can get placed and constrained by the stirrups which are further constrained to the rebar cover settings.

Friday, May 16, 2014

Tips on Placing REVIT Rebar and Stirrups


Placing Rebar in a concrete column in plan view can be a quite a frustrating experience. . . . that is until you read read post.

We get the 'stop sign' symbol (seen below) on our cursor when the rebar cannot be placed and it can be a real pain in the butt.


A few tips on Placing Rebar

1. Know when to use parallel vs perpendicular. In a plan view, column Stirrups would be parallel and the continuous bars are perpendicular. Same thing goes for a section view of a beam.

2. Make sure your current 'workplane' is in fact cutting the column (beam etc). When you click to open the view 'Level 1' REVIT sets the workplane to > level 1 which may be the base of the column but is not actually 'cutting the column'. (see image below) This is the no. 1 issue. You need to raise the 'workplane' to at least 'cut' the column. This means creating a reference plane, naming it and making that your current work plane.

3. Don't get your viewing 'cut plane' mixed up with what is your current work plane although the two work together.

4. You should be looking towards the current workplane and the workplane should be within your view range.

5. Here's a good one. If the cut plane is in fact cutting the column but it is above your view direction it will let you place the stirrup BUT you won't be able to see it. Then we usually proceed to add 3-4 more stirrups to convince ourselves because at least the stop sign is gone and it appears to be placing the rebar only to discover a little pile rogue stirrups later on, probably in a 3d view.

6. Make sure the rebar size you have specified is not too big to make the correct bends. Trying with a smaller bar size can sometimes show better results. Always worth trying just to eliminate that as a possible problem.

We see more problems with plan views than section views because in a section view REVIT naturally makes your section line also the workplane but in a plan view it does not make your workplane at your cutplane it moves your workplane to a level !!

See images below.

The Dreaded Stop Sign.
Either your workplane is NOT cutting the column or the rebar size is too big to make the bends. 


---------------------------------------------------------------------------------


It works ! 
(oh what a feeling when you finally see that rebar)
Make the current 'Workplane' the new reference plane (named Rebar)which is cutting the column and it works !


Tuesday, May 06, 2014

CADclips for only $10

This promotional offer ended January 15th, 2016.

CADclips

Sunday, April 13, 2014

REVIT 2015 Sketchy Lines Rock

Sketchy Lines are simple, cool, fun and REVIT will never be the same !

In summary it works globally by view or view template by jittering the linework and adding end extensions. If you have lots of detail there will be lots of jittering. The jittering line weights are controlled by the object style and / or element / category overrides. This will make or break any blotchiness.

Object style, detail level, visual style and scale factor still do what they normally do.

From what I see the jittering should be dialed up in 3d views, mid way for elevations and dialed down for floor plans.

The jittering also leaves gaps that can be closed by dialing up the jittering.

It even jitters imported CAD files.

Here's a few images and a quick video tutorial.


Friday, April 11, 2014

REVIT Design Suite Premium ArrIved Today !

It's like Christmas Morning over here and can't wait to start publishing all kinds of great REVIT 2015 Tips, Tricks and New Features !