I was reviewing the concept of enabling and using REVIT Worksets to someone who had to learn the concept pretty much immediately.
In a nut shell, REVIT Worksets allow multiple users to work on the same project file at the same time which equates to productivity and distribution of REVIT skill sets on the project.
". . . . . .and this ain't AutoCAD Xref's my friends !"
Outside the multi user access, Worksets allows you to break up the model into logical user defined groups (for lack of better word) of your choice. The value of this comes blazing through when you are undertaking a large project with a large model file and a hand full of REVIT users with 'varying skill sets'.
It allows you to 'check out' a Workset and you become the temporary owner of that workset. You do not need 'editing access' to the entire model to do your work (although you can see the entire model and you can borrow elements from each other). Having the entire REVIT model available for 'editing' maaakes yooour commmmputer gooooo sloooow. Here's a scenerio > Today
I am working on 'exterior walls' and you are managing all the 'sheets'. Someone else is working on 'Stairs and Ramps'. A forth person is managing the 'links' from other REVIT models. Can you just see the productivity !
Here's a few possible workset names:.A Wing, B Wing, C Wing, Building Core, Exterior Walls, Interior Partitions, Curtain Walls, Foundations, Views, Furniture, Bathrooms, Windows, Doors, Roofs, Floors, Site, Sheets, Levels and Grids, Annotation, Railings, Egress, Load Bearing Walls, Project Standards, Mechanical, Structural, Architectural, Level 1 Walls, Level 2 Walls, etc. etc. You can make up your own workflow logic.
Worksets are not just limited to tangable elements like walls and floors and roofs. Worksets can included things like material definitions, annotation styles, views, families.
REVIT automatically generates specific worksets. The rest is up to you.
Here's another good use. Worksets allows you to manage the model editing access based on REVIT user skill. Junior staff do not get access to the critical elements of the model.
Worksets can be allocated based on REVIT skill set or expertise.You draw the line !
Below are a few pointers on the 'overview' of enabling and using REVIT Worksets. If anyone wants to add to this please feel free. I know there's more to it than just this.
Part 1 - Prepare and create the Central File.
1. Get the Project under way by regular REVIT processes and create the levels, grids, floors, exterior walls, roofs and 'project standards'.
2. Save the Project as is and then save it again and name it using the word 'Central' for example Central_Halifax_Theatre.rvt.
3. Open the new file named 'Central' and Enable 'Worksets'.
4. (Optional) Split the project up into additional worksets other than the default 'Workset1'.
5. Save this new Central file on the server, then close it. It is now a true Central File.
(REVIT can actually distinguish the difference between a regular rvt file and a central rvt file when the file gets opened)
Part 2 - Creating a local copy of the Central file for editing purposes
6. Varify your 'Username' in the REVIT Options dialog box under the 'General' Tab'. This will be used to name the local file you are about to create.
7. Varify the 'Default Path for User Files' in the REVIT Options dialog box under the 'File Locations' tab. This is where the local file will get located by completing the next few steps.
8. Open the central file but MAKE SURE YOU CHECK THE 'Create New Local' toggle.
Warning !!
DO NOT OPEN THE CENTRAL FILE from here on in unless you are an administrator.
Always, always always create a local copy.
I once saw a newbie double click a central file from windows explorer. My eyes bugged out and I just about #$%& myself !
9. Save the new local copy to your c:\ drive and put your own name in the file name.
For example Halifax_Theatre_YourName.rvt or consider the name REVIT prompts you with by appending the Central file name with your REVIT user name.
10. Work in this new local file, check out worksets or borrow elements. Save it locally regularly, save and synchronize to central regularly and relinquish elements / worksets you no longer need to edit.
11. Use the 'Reload Latest' tool up update your local file but not save your changes to the Central File. This is 'oneway' communication with the Central file.
12. At the end of the day
save locally,
save to central,
relinquish all elements,
close the local file
. . . . hit the golf course.
13. It is also highly recommended and a best practice to repeat steps 8 and 9 each day.
Yes this sounds crazy but true.
In other words, scrap yesterday's local file and start each working day with a fresh new local file. Don't be scared. Over time, local files can develop issues that can even effect the central model so don't keep your local file around for too long.
Rename the local file and save it away somewhere but make a new, fresh local file at least every couple days. You've been told : )
A wonderful 15 video series (approx. 3 hrs) has been produced and should be posted at CADclips shortly.
---------------------------------------
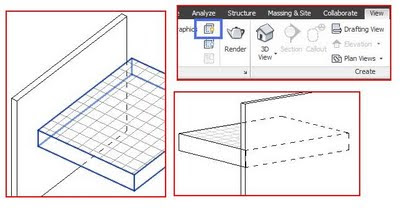
Below is a snipit of information on the new
REVIT 2012 Worksharing Display Modes


